
Tutorials › GhostDMA Setup Guide
GhostDMA Setup Guide
Install, connect, set up the driver, and run a speed test for your GhostDMA.
Before installing The main computer must be turned off and disconnected from power. Plugging or unplugging the GhostDMA while it is powered will damage it.
Note GhostDMA ships pre-flashed with public firmware. Replace the firmware only after the GhostDMA has been installed and tested.
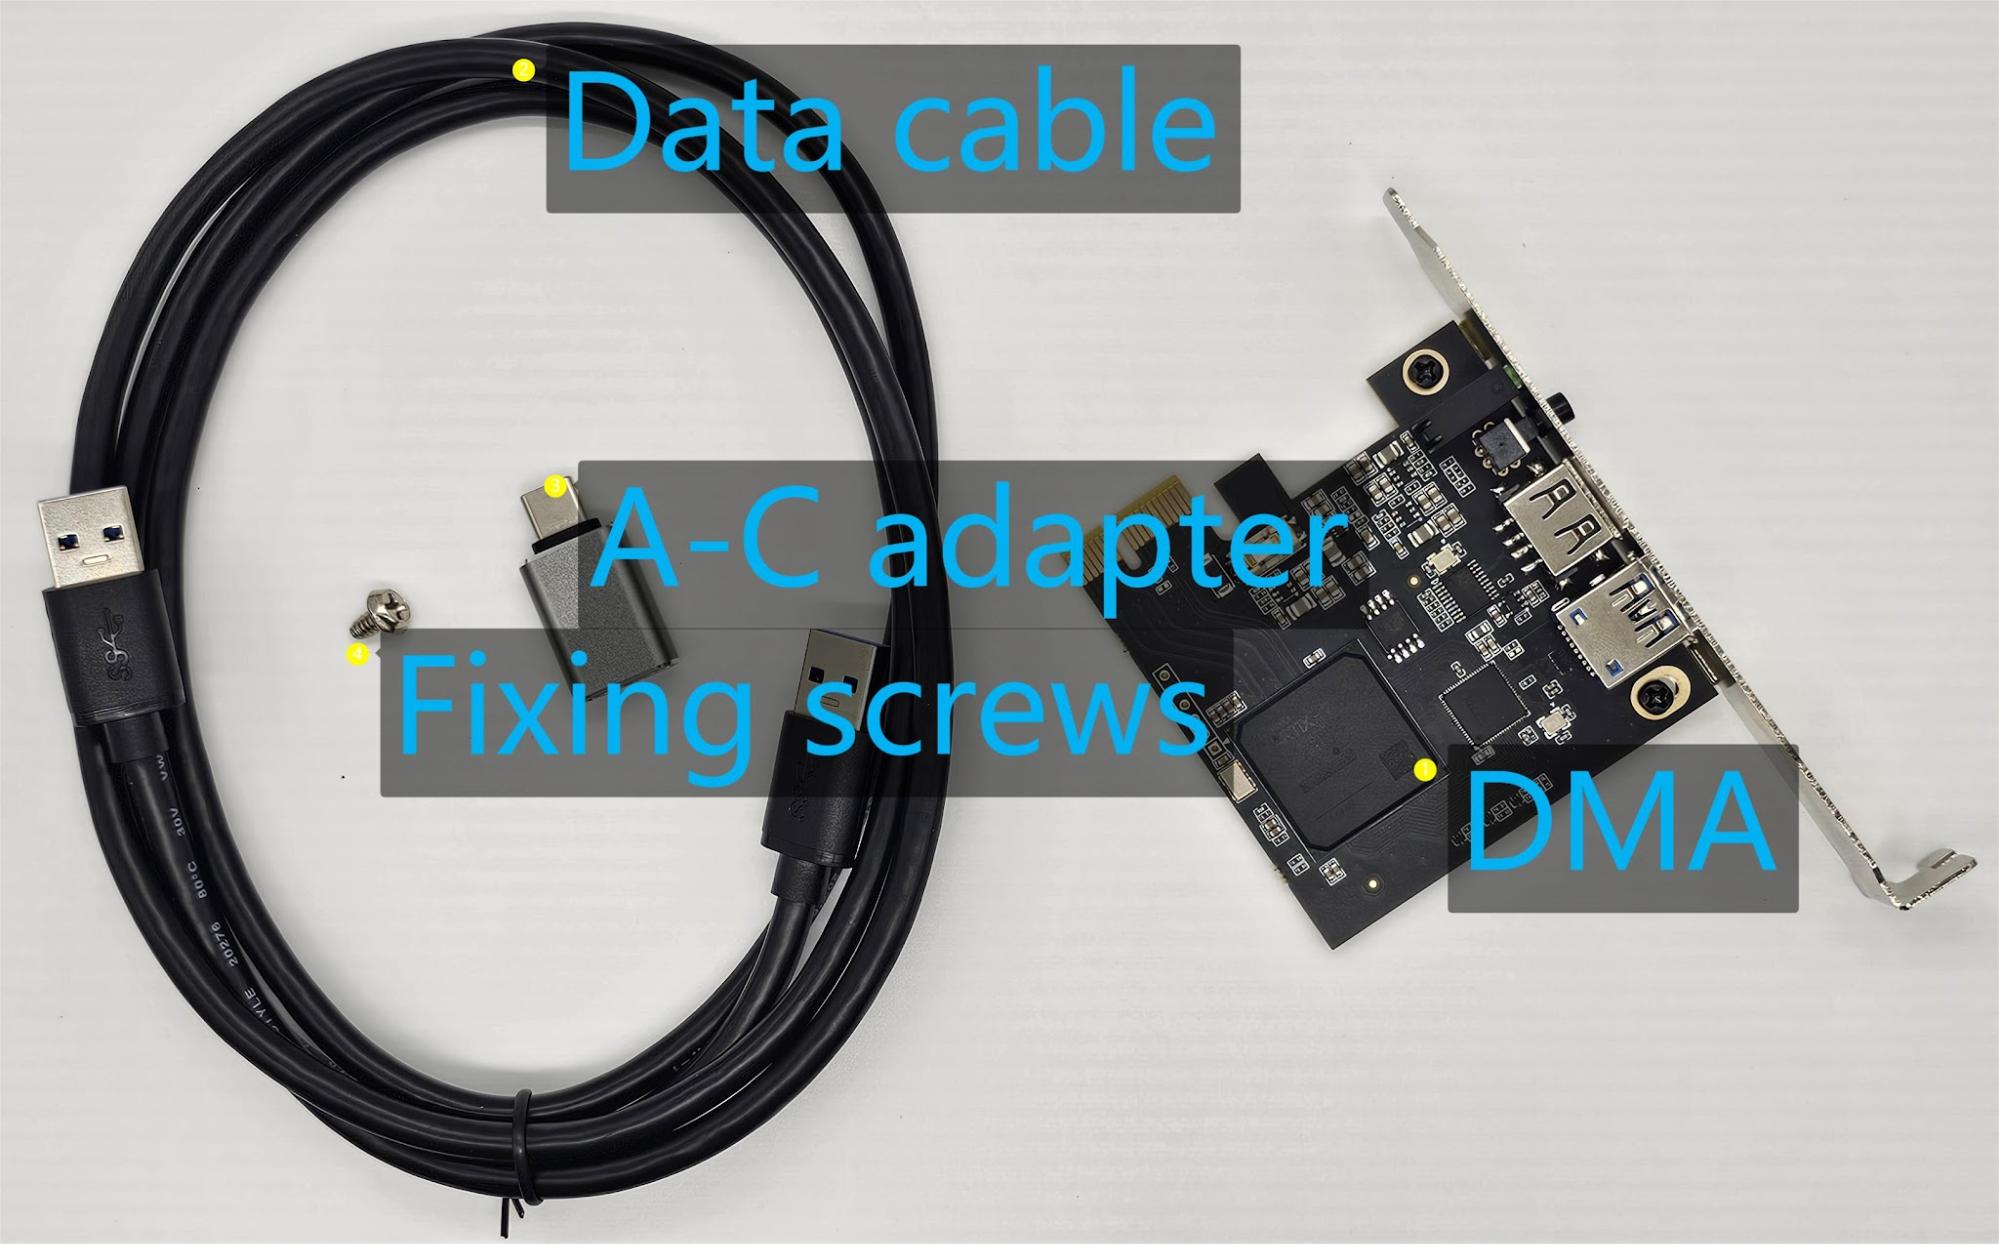
1. What’s in the box
- 1 × GhostDMA
- 1 × A-C adapter — if it isn’t recognized when plugged in, rotate it 180° and plug it in again.
- 1 × Data cable (1.5 m)
- 1 × Fixing screw — tiny and easily lost in customs/logistics; a spare case or graphics-card screw also works.
2. Functional Description
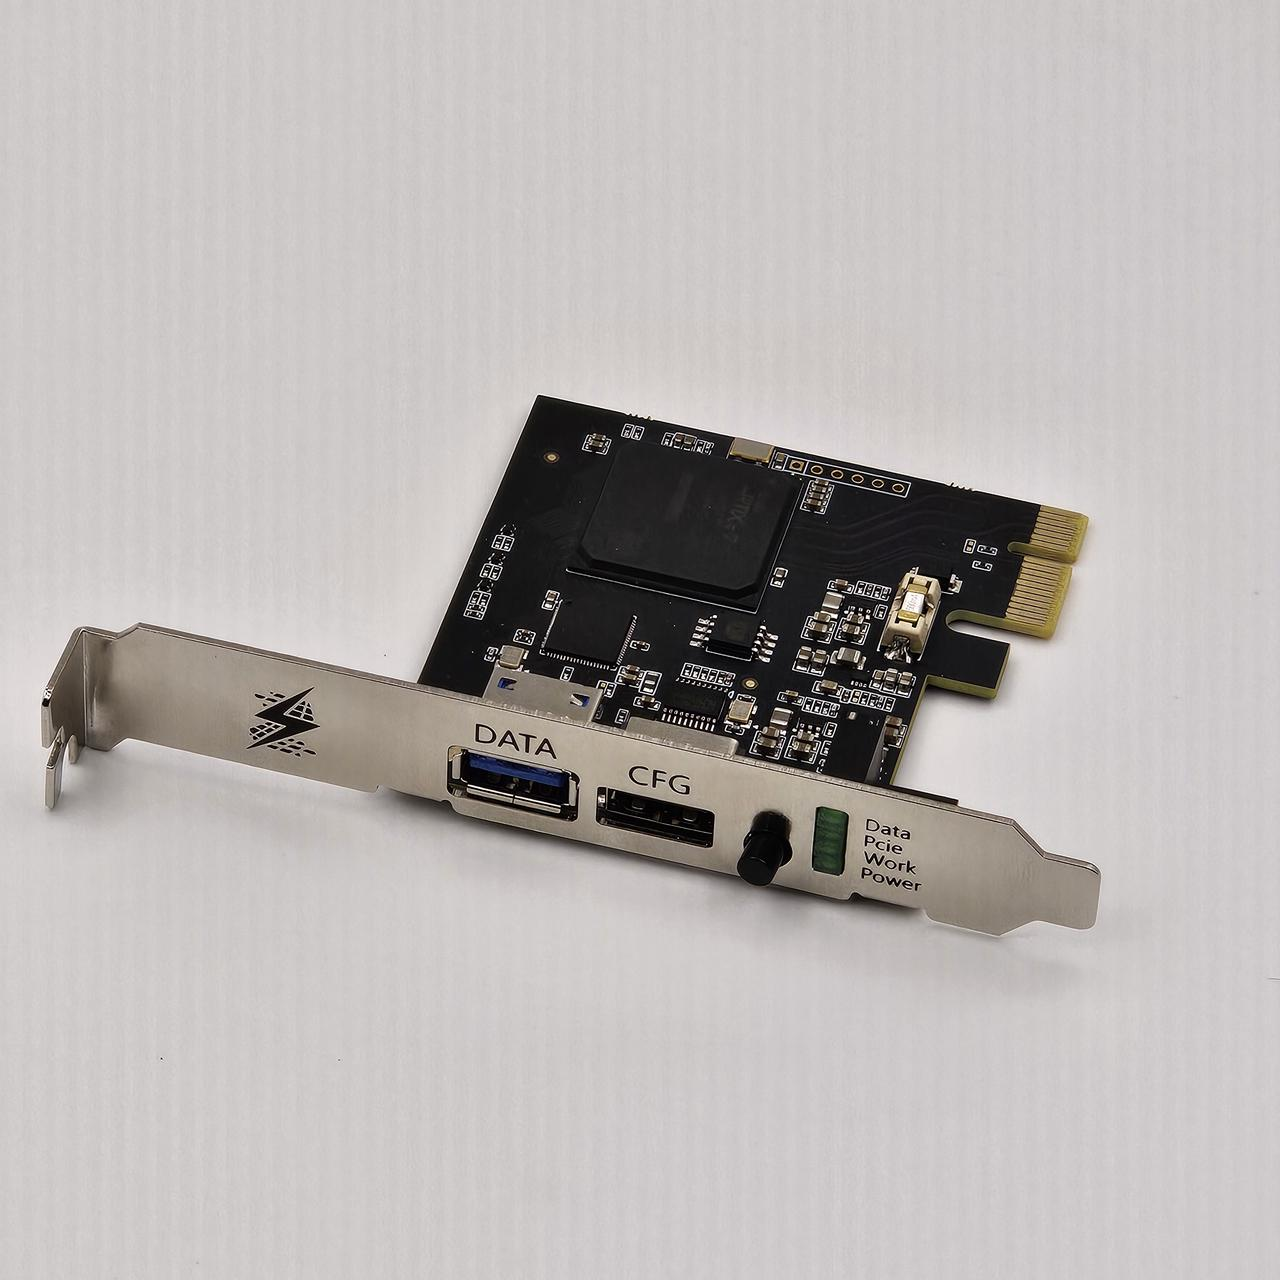
- DATA — connects to the control computer so it can call the GhostDMA.
- CFG — firmware flashing.
- Switch — turns the GhostDMA off without opening the case. Only operate it while the computer is off. Press to switch on, release to switch off.
- Indicator — the Power light comes on whenever the motherboard is powered, even if the switch is off. While the Power light is on, do not unplug the DMA from the motherboard — that will damage it.
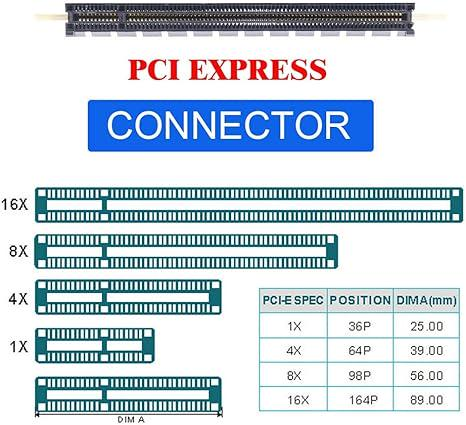
3. Installation
- Power down. Shut down the main computer and disconnect power to prevent damage.
- Pick a slot. Any available PCIe slot works — the slots shown below can all take the DMA directly. Just choose any free slot.
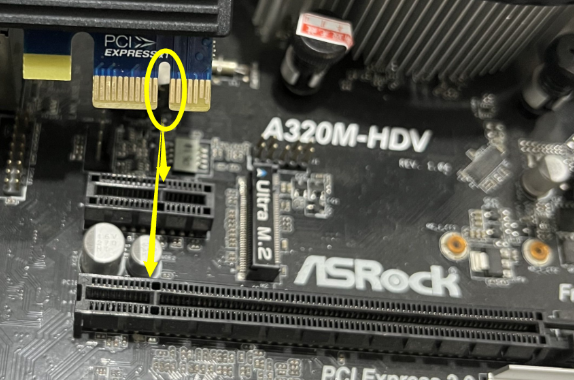
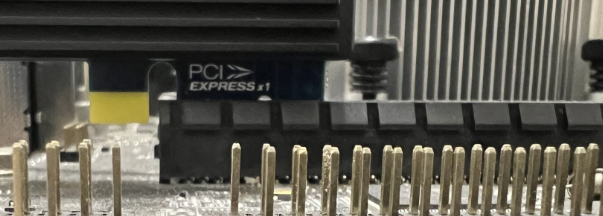
Not sure how to fit a card into a PCIe slot? This short video shows the same process: How to Install a Card into a Desktop PC.
- Set the switch to ON (press to switch on, release to switch off).
- Install the card. Align the GhostDMA with the PCIe notch on the motherboard and insert it fully into the slot, then fix it to the case with a screw.
- Connect the data cable. Plug one end into the GhostDMA’s DATA port and the other into a USB port on the control computer.
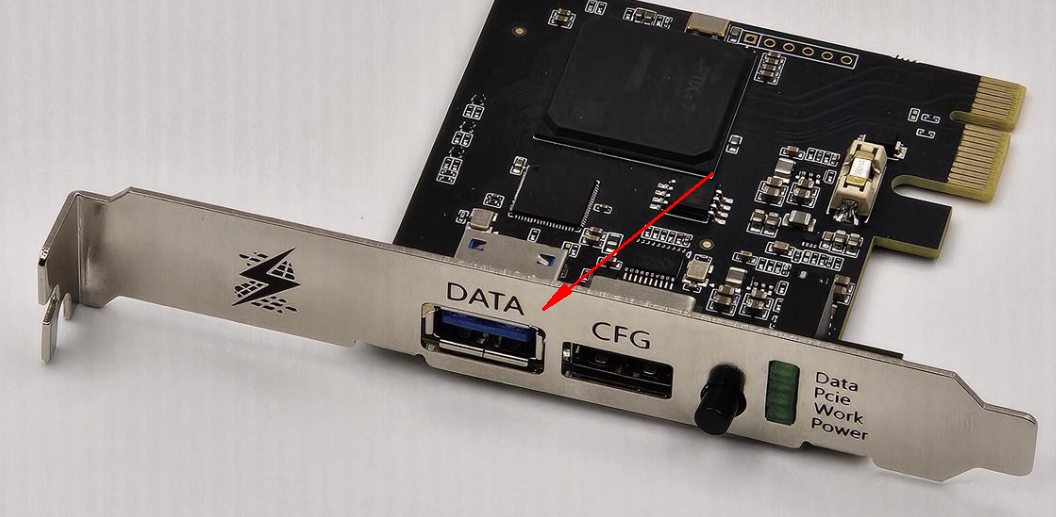 Plug directly into the computer Use a USB port on the computer itself, not a case front-panel port or hub. Once the DMA is fixed in place, the data cable can be plugged/unplugged at any time — but the DMA itself must only be plugged/unplugged with the main computer powered off.
 - Final check. Confirm the DMA is fully seated and the data cable is connected correctly, then power on the computer as normal. (Boot order doesn’t matter, as long as you don’t unplug the DMA.)
4. Driver Installation
Unless your control computer and main computer are the same machine, the main computer needs no DMA software or files.
- Confirm the GhostDMA’s DATA port and the control computer’s USB port are connected. Confirm the main computer is on and the GhostDMA’s work indicator is lit.
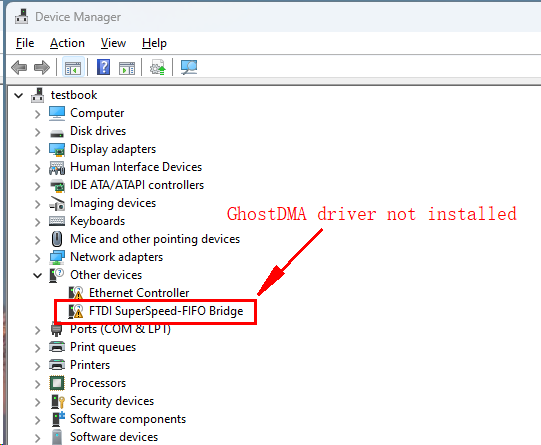
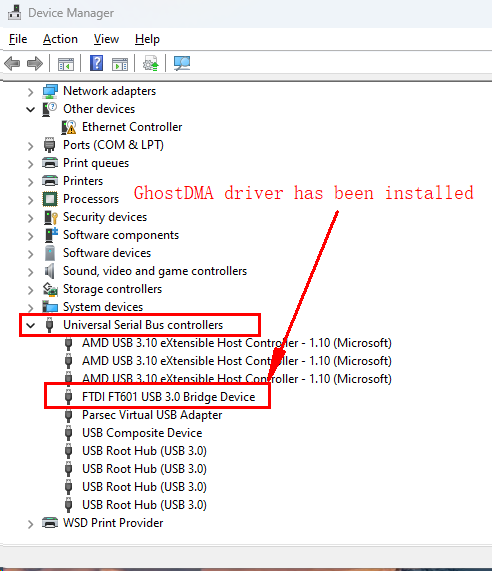
- Open Device Manager on the control computer and check whether the GhostDMA is connected. If the driver did not install automatically, install it manually (next step).
- Install the driver manually. Right-click the FTDI SuperSpeed-FIFO Bridge item (marked with an exclamation point) → Update Driver → Browse my computer for driver software → Browse → select the
FTD3XXDriver_WHQLCertified_v1.3.0.4folder → OK to install.In the driver selection step, just select theFTD3XXDriver_WHQLCertified_v1.3.0.4folder — you don’t need to pick a specific system or version.
5. Test
- Uninstall antivirus software on the control computer and turn off the firewall.
- Install VCRedist. VCRedist
- Download the test file. Download Test File
- Unzip and run
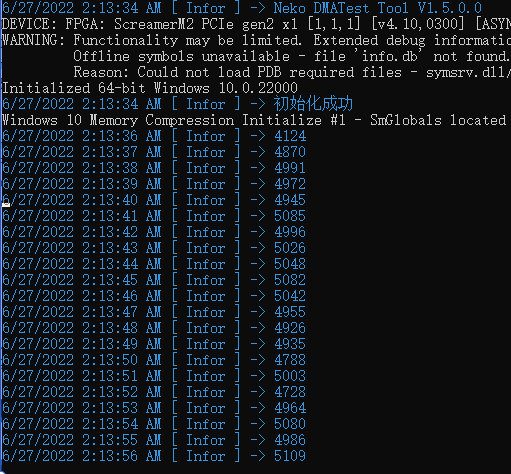
DMATest1.5.exe(do not run as administrator). If numbers keep appearing in the console window, the test passed. That number is your DMA speed — the bigger the better; most people see around 6000.
6. Firmware Flashing
Firmware is flashed through the CFG port. Follow the GhostDMA Flash Guide, or reach out on our Discord if you need the latest firmware or help.