
Tutorials › Get Your FPGA DNA
How to Get Your FPGA DNA (via Vivado)
Every board has a unique DNA value burned into its FPGA. You’ll need it for firmware licensing. This guide shows how to read it with Xilinx Vivado.
1. Download & Install Vivado 2022.2
The official download requires a free Xilinx account. The Vivado Lab Edition is all you need — it’s a lightweight standalone package that includes the Hardware Manager.
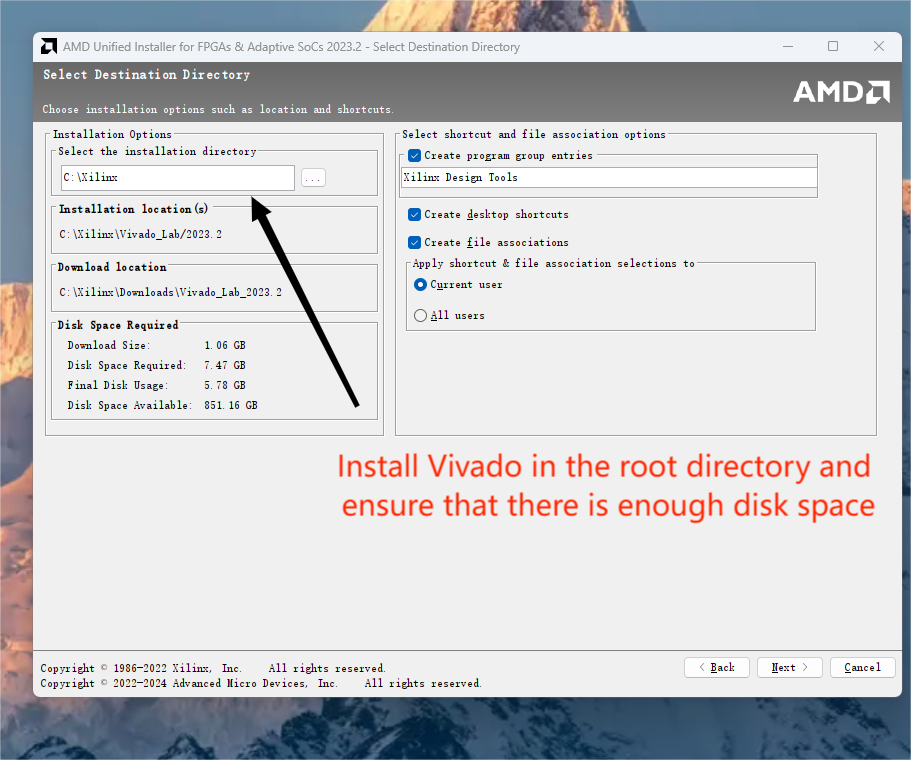
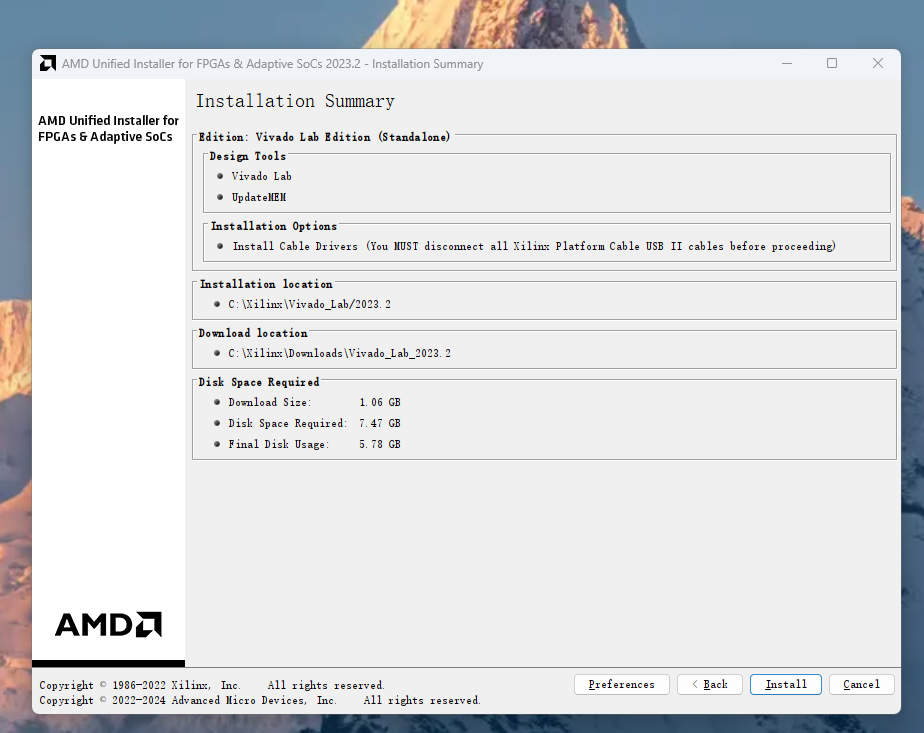
Important Follow the installer screens exactly as shown below to avoid downloading unnecessary components. Install Vivado to a root directory (e.g.
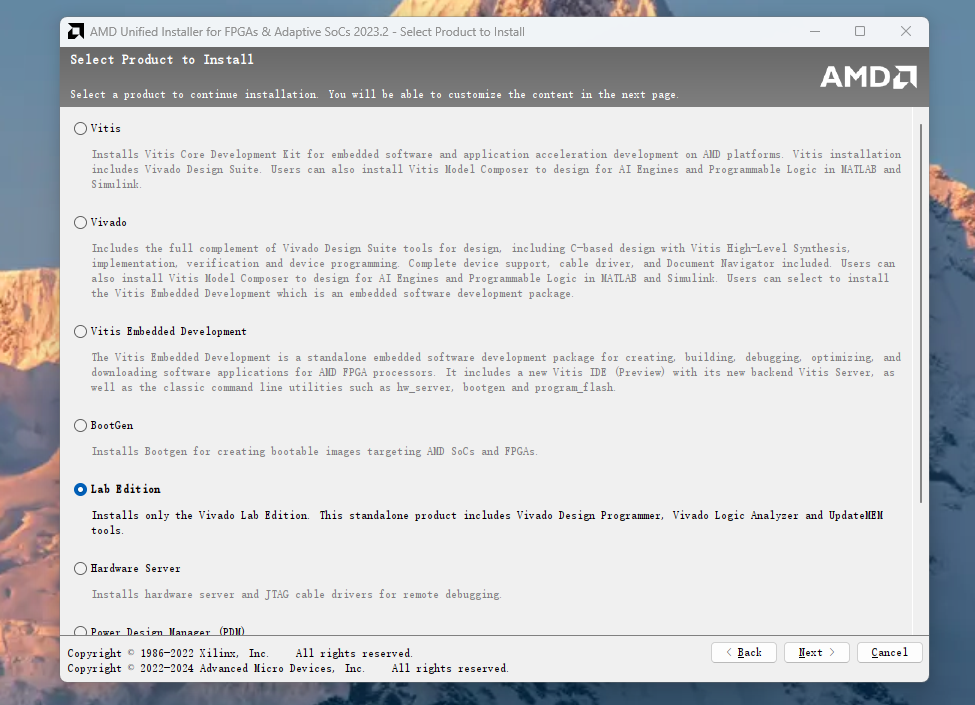
C:\Xilinx) and make sure you have enough free disk space (~8 GB).- In Select Product to Install, choose Lab Edition.
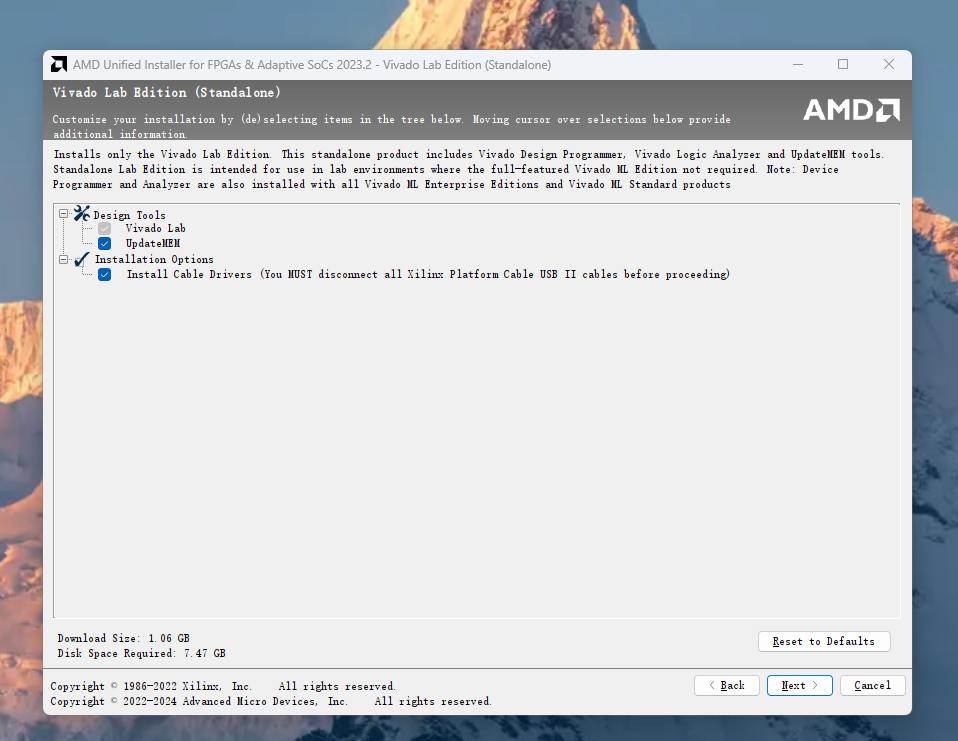
- On the customize screen, keep the default Design Tools (Vivado Lab, UpdateMEM) and Install Cable Drivers checked.
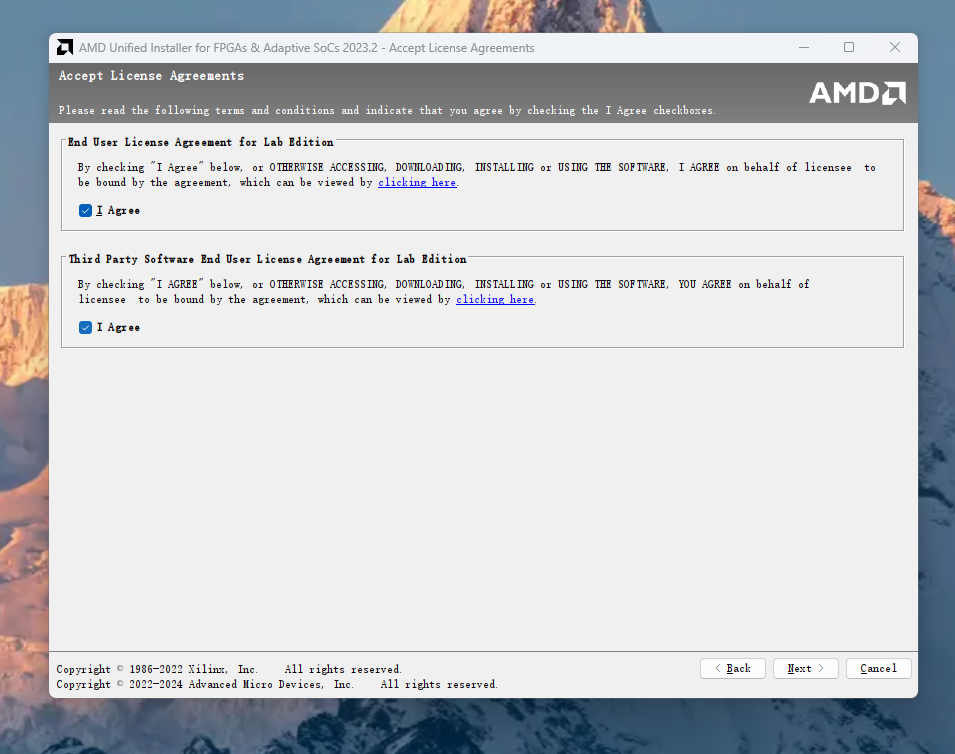
- Accept the license agreements (tick both I Agree boxes).
- Choose the destination directory — keep it near the drive root.
- Review the installation summary and click Install.
2. Connect the Hardware
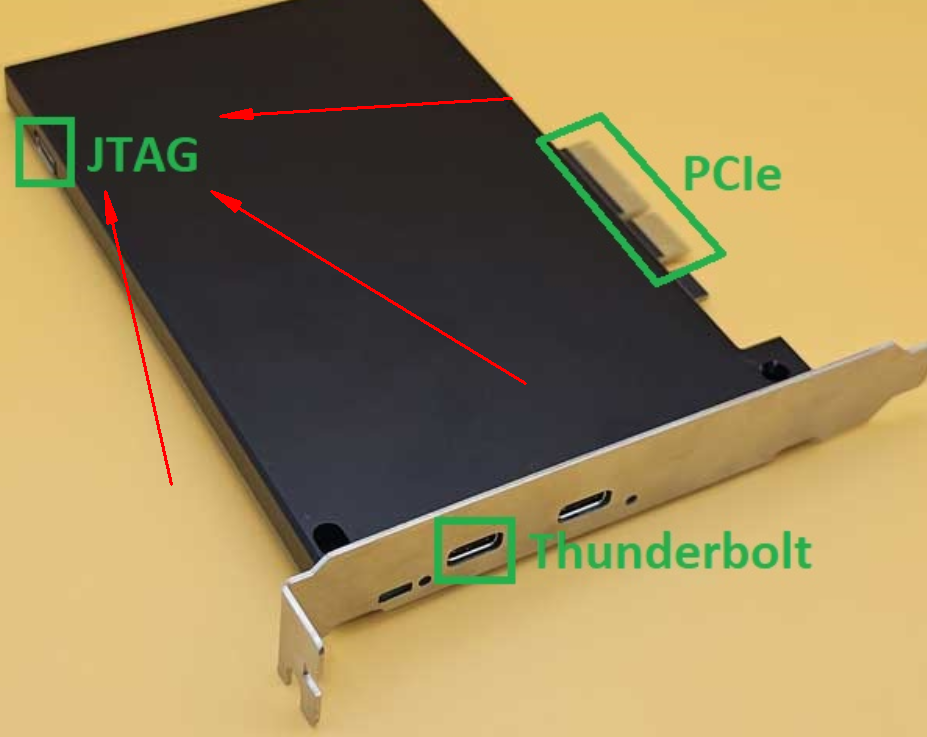
Connect your FPGA board to your PC using a JTAG cable.
Do not use the Thunderbolt cable for JTAG. The JTAG port needs an ordinary USB cable — the included Thunderbolt cable will not work here.
3. Read the DNA in Vivado Hardware Manager
- Open Vivado 2022.2 and select Open Hardware Manager from the left menu.
- Connect to the device: click Open target → Auto Connect. Once connected, your FPGA model (e.g.
xc7a35t_0) will appear. - Retrieve the DNA value:
- In the Hardware window, right-click the device → Properties.
- Expand Registers → EFUSE and find the FUSE_DNA item.
- The DNA appears in hexadecimal, e.g.
0x1F0A3CDA12345678.
Two values shown? If you see two DNA values and aren’t sure which to use, take a screenshot and send it to us — we’ll confirm the correct one.