
Tutorials › ZDMA Setup Guide
ZDMA Setup Guide
From unboxing to a passing speed test — everything you need to get your ZDMA up and running. Section 4 covers getting your existing software to talk to the ZDMA; if you are wiring it into a project of your own, the integration methods, version rules and code samples live in the LeechCore Integration Guide.
- Do not touch the circuitry directly with your hands — static electricity can damage the ZDMA.
- Before installing, shut down both the main and console computers and disconnect them from power.
- Do not dismantle the ZDMA without authorization — doing so voids the warranty.
- Do not destroy the label/tag. It holds the only identifying information for your ZDMA and is required for upgrades. It’s best to photograph it and save it to your phone.
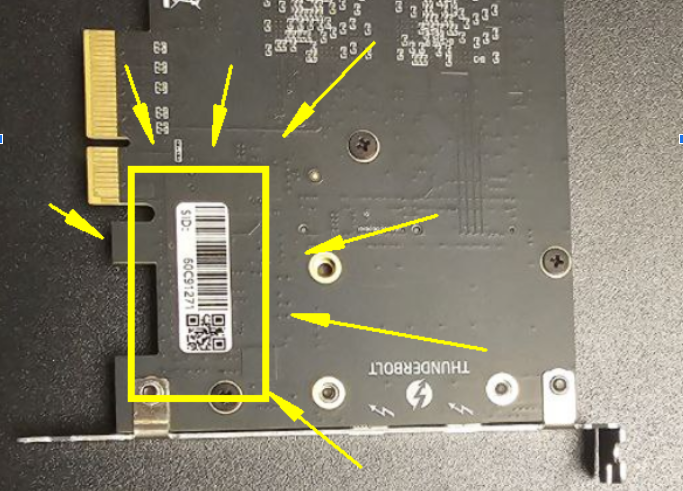
1. Overview
What’s in the box
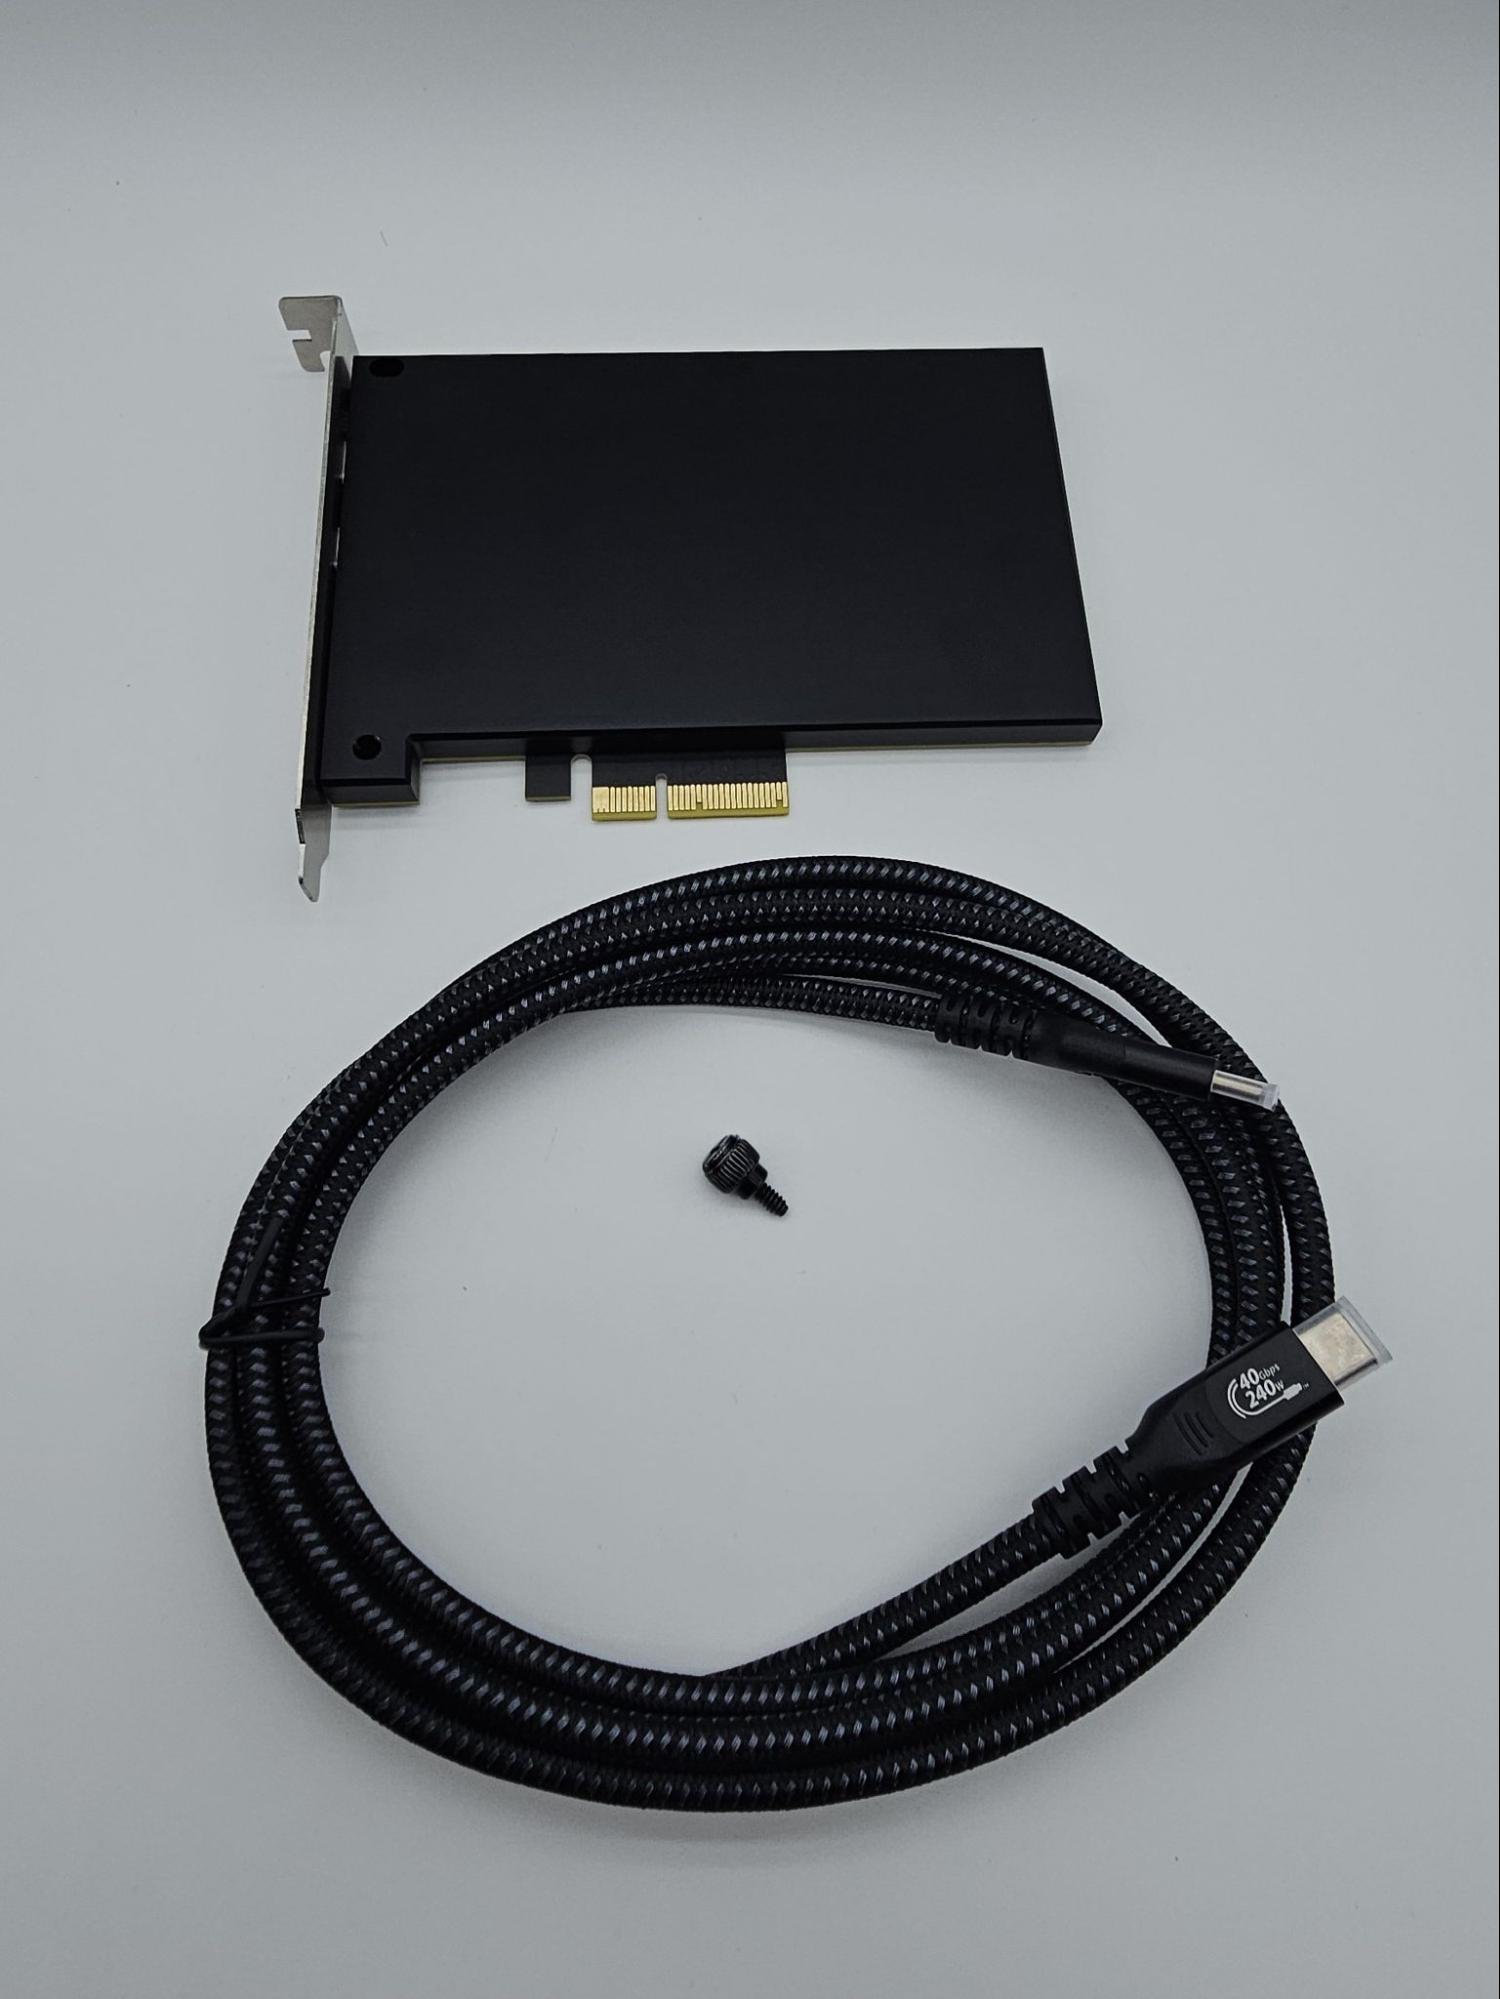
- 1 × ZDMA
- 1 × Thunderbolt cable (1.5 m)
- 1 × Screw — these are tiny and can be lost during customs/logistics inspection; you can also use a spare case or graphics-card screw to secure the ZDMA.
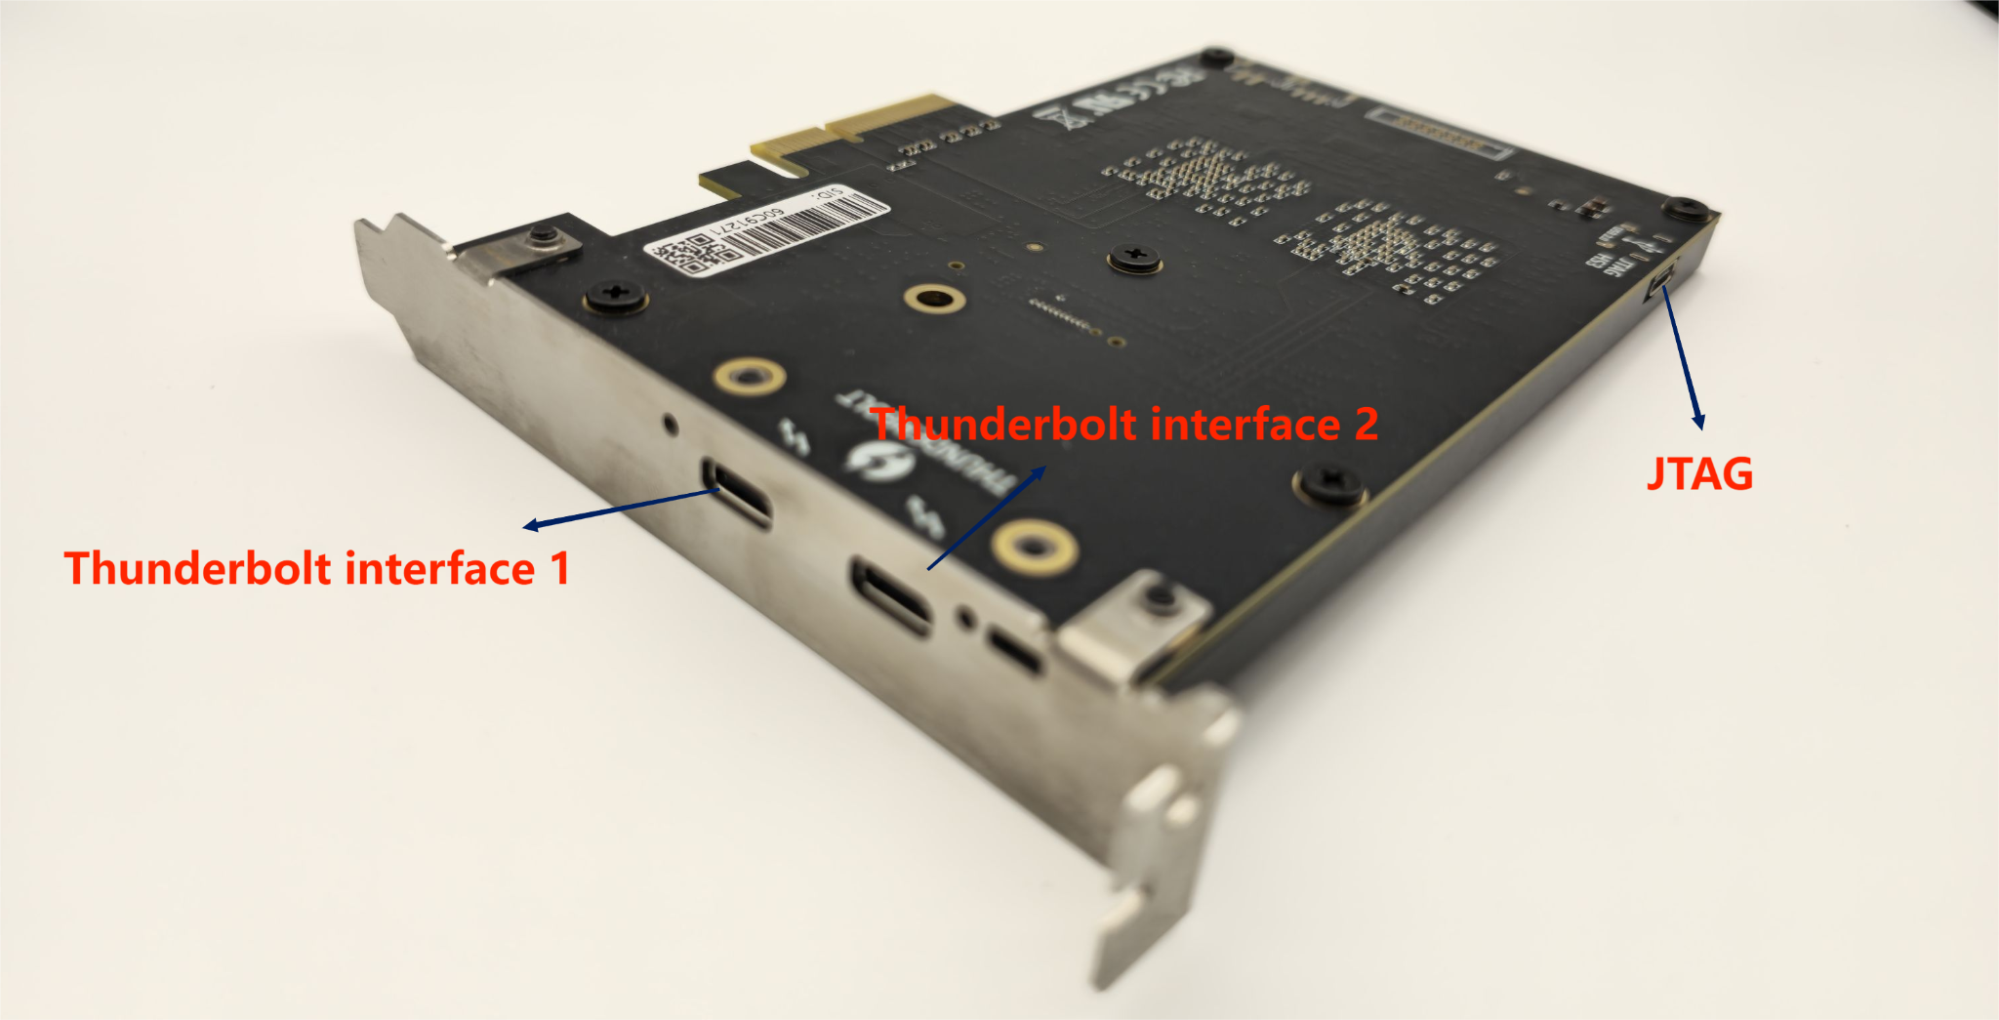
Interfaces
- Thunderbolt interface 1 — data transfer only (no power). Best compatibility. Recommended.
- Thunderbolt interface 2 — fully functional with 60 W power supply, made of better material. Use this if your control computer must supply power through its only Thunderbolt port.
- JTAG — firmware flashing.
2. Installation
- Power down. Turn off and disconnect both the main and console computers to prevent damage.
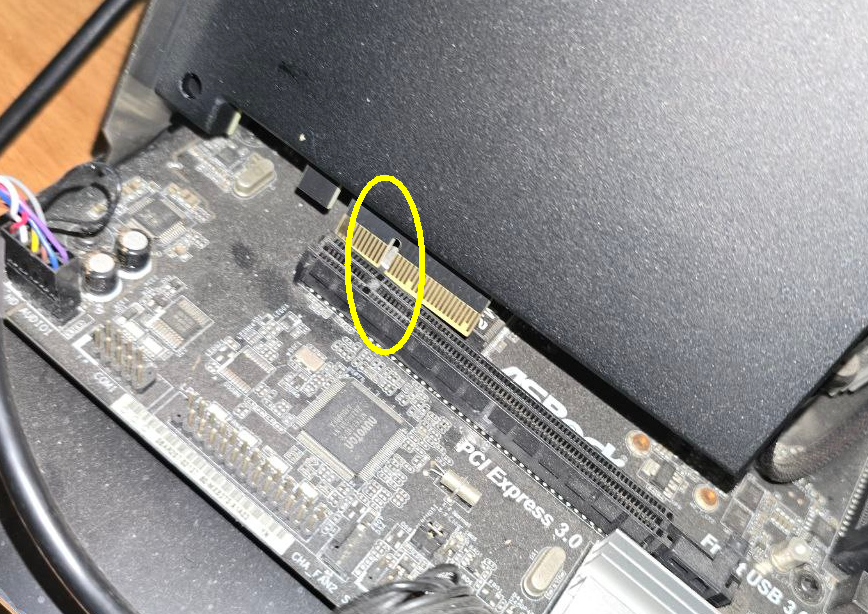
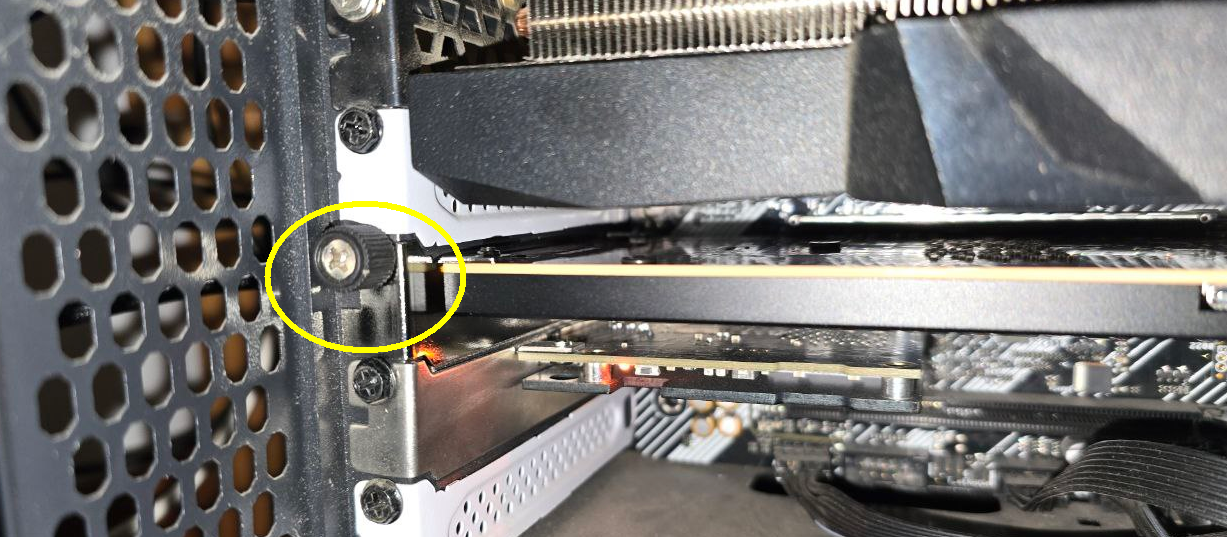
- Install the ZDMA. Align it with the notch on the left side of a PCIe X4 or PCIe X16 slot, insert it vertically, then secure it with a screw.
Secure it firmly. The ZDMA is heavy — if it’s not fixed in place it may vibrate loose during use and be damaged.
- Connect the data cable. Use the supplied Thunderbolt cable: one end to the ZDMA’s Thunderbolt interface 2, the other to your console computer’s Thunderbolt port.
 Notes Once the ZDMA is secured, you can connect/disconnect the cable with the computer on — but never unplug it while the ZDMA is being used by software, or your console computer may crash. The ZDMA transfers data only over Thunderbolt: a normal USB-C port or ordinary USB cable will not work — use a Thunderbolt III or IV cable.
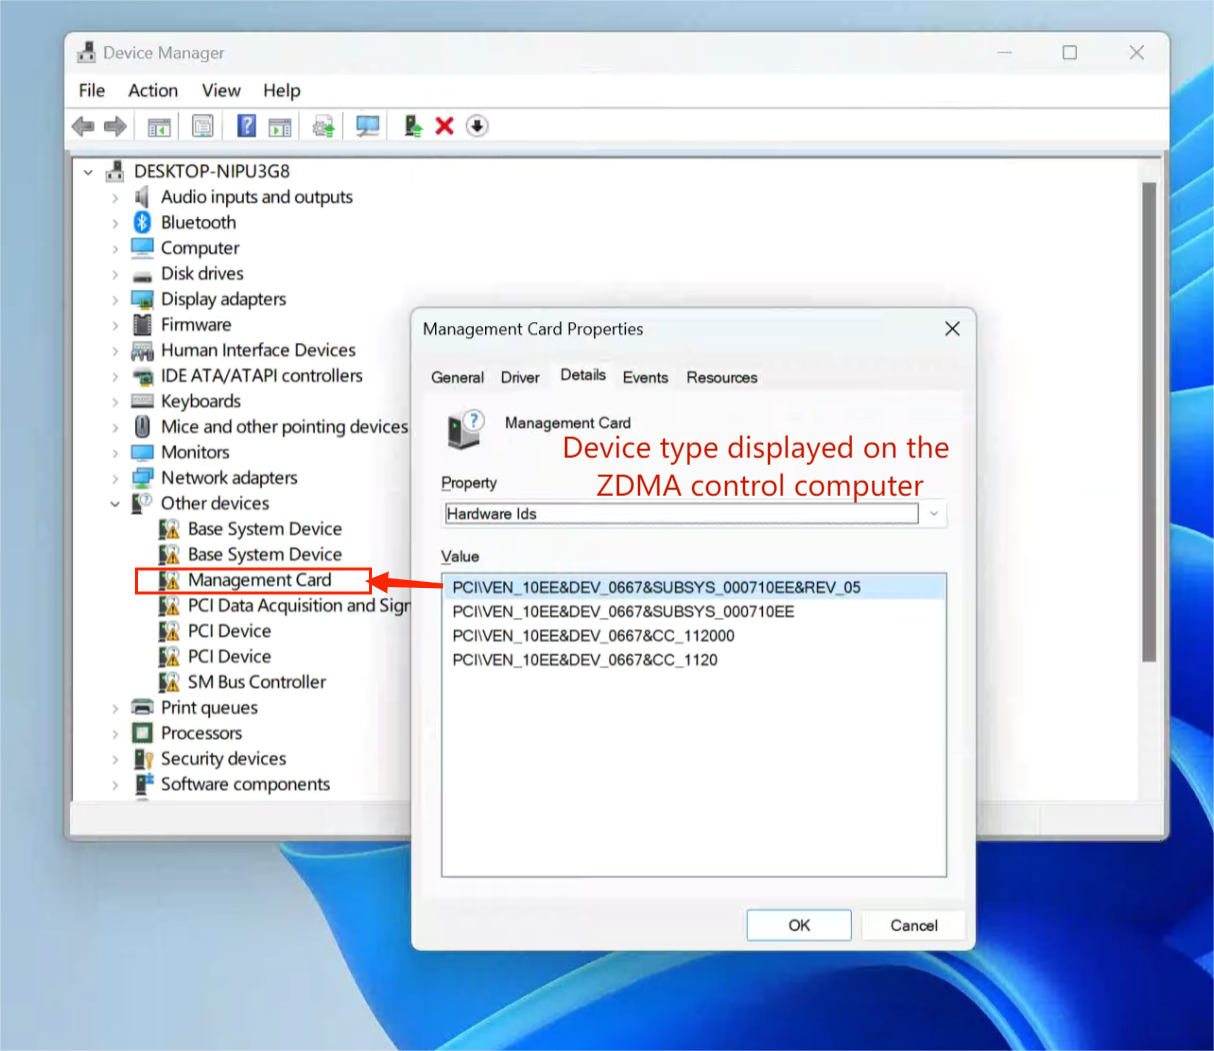
 - Install the driver (on the console computer). Unzip the driver, then: right-click Start → Device Manager → right-click the Other device / Management Card → Update driver → Browse my computer for drivers → select the driver folder → Next → Install this driver software anyway.
3. Test
This step only confirms that the hardware is installed and running. It has nothing to do with whichever software you plan to use later.
- Turn off security software first. Uninstall the antivirus on the console computer and turn off Windows Defender. Antivirus software blocks DMA reads and writes, so the test will never pass while it is running.
- Run the test program. Download and unzip our test file, then double-click
DMAtest.exe. A continuously changing number in the window means the test passed — the bigger the better. You don’t need to note the value down; it just has to keep refreshing. Our test program already bundles everything it needs (including the latestleechcore.dll), so unzip it and run it — no DLL version juggling on your side.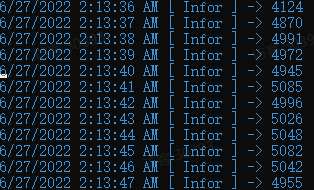 Using our test program? You can skip this box. If you use a test tool someone else gave you, or one you compiled yourself, first replace the
leechcore.dllin the tool’s folder with the latest one we provide (button below). An outdated DLL will not recognise the ZDMA, so no numbers ever appear — which looks exactly like a hardware fault.Technical detailThe archive’s
leechcore.dllandleechcore_driver.dllmust be used as a pair from the same release — never mix versions. Before running your own code, verify version alignment and connectivity withpcileech.exe -device fpga probe.If no numbers ever appear, first work through the Device Not Detected troubleshooting guide — it covers ports, LEDs, firmware, BIOS and drivers. If that does not solve it, send us a full screenshot of the test window (Discord or email) and we’ll work out which step went wrong.
4. How to Use
Once the test passes, everything left is on the software side. In user mode the ZDMA is the LeechCore DLL pair: as long as a process loads our leechcore.dll and leechcore_driver.dll through the Windows DLL search order, it gets the device. Most programs still ship their own older LeechCore build, so start by checking whether those DLLs can be swapped.
Case 1: The DLLs can be swapped (most off-the-shelf programs)
- Close the target program and confirm the process is gone — background instances included, or the DLLs stay locked and cannot be overwritten.
- Unzip our package to get
leechcore.dllandleechcore_driver.dll. - Copy both files into the directory holding the program’s exe, keeping a
.bakof the originals so you can roll back. Windows searches the exe’s own directory first, so that is where your copies win.Swap both files togetherReplacing only one leaves the versions mismatched:LcCreatefails outright, which surfaces as “no device found”. If the directory also holdsvmm.dll(MemProcFS), it has to come from the same release. - Start the program again.
Download leechcore.dll (driver included)
Case 2: The DLLs can’t be swapped, or the swap changes nothing
Any of the following means the problem sits above the file-swapping layer:
- There is no
leechcore.dllin the program’s directory — it is packed into the exe and extracted at runtime, or loaded straight from memory. - After the swap the program won’t start, reports a failed file check, or crashes immediately (it verifies its own integrity).
- After the swap it still reports no DMA device, while our test program reads numbers fine — the hardware is good, so the caller is the problem.
From there it comes down to whether the program is yours to change:
- Yours to change — you wrote it, or it is open source and you can rebuild it: one pass through the integration guide is all it takes. Both routes (DLLs next to the exe, or both DLLs embedded as resources in a single-file exe) come with full code samples and a troubleshooting table.
- Not yours to change — a closed-source third-party program: send the author the integration guide and mention you are on a ZDMA. The adaptation is small, and one round usually settles it.
ZDMA / LeechCore Integration Guide
FTD3XX.dll is not required (that one is for FT601 / USB3 boards). Pick one of two integration methods: DLLs next to the exe (recommended during development — easy to debug, DLLs upgrade individually), or embed both DLLs as exe resources, extract them to one temporary directory at startup, then SetDllDirectory + LoadLibrary (recommended for external delivery; pure in-memory loading fails on the second-level driver dependency). Also note that ZDMA firmware v4.17 / FPGA1 v4+ requires the latest leechcore.dll. Full rules, code samples and a troubleshooting table are in the integration guide above.5. Firmware Build & Flash
Flash with the LightningZ Flasher Tool — no Vivado needed. The dedicated guide walks you through it step by step:
All firmware information for the ZDMA is published in Ulf Frisk’s pcileech-fpga / ZDMA project, including full build and flashing tutorials.
- After flashing completes, shut down the main computer, unplug power for 10 seconds, then turn it on again so the ZDMA loads correctly — do not simply restart.
- The tool locks the target for you: your own firmware goes to FPGA0; FPGA1 is flashed only through online matching.
- The JTAG port is not compatible with the Thunderbolt cable — use an ordinary USB cable to flash.